Setting up a private Verdaccio registry is generally quite easy, and there are plenty of tutorials and videos covering its setup. Unfortunately, most of those resources focus on setting up Verdaccio on a local system, and when docker is involved the tutorials usually assume docker is being run from the command line.
Running docker containers on a Synology NAS is a completely different process, and I wasn’t able to find even a single resource that covered the procedure. This post will hopefully clear some things up.
Docker
First things first, you’ll need to install the Docker package if it’s not already installed. Docker is a lightweight virtualization application that gives you the ability to run thousands of containers created by developers from all over the world on DSM. The hugely popular built-in image repository, Docker Hub, allows you to find shared applications from other talented developers. — Synology DSM Feature: Docker
|
For more in-depth information, see How to use Docker on a Synology NAS.
Folder Setup
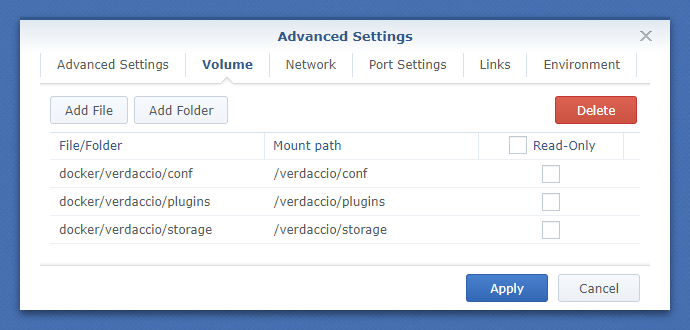
When working with Docker containers, I try to handle them like read-only objects whenever possible. If the container needs to work with persistent data, that data should be stored outside the container. It’s common for containers to provide “mount paths” that can be used to map file system folders to the container. The container will then store data in those mapped folders. Later, if you decide to update or replace the container, the persistent data will remain in these folders. Don’t store data in containers - A container can be stopped, destroyed, or replaced. An application version 1.0 running in container should be easily replaced by the version 1.1 without any impact or loss of data. For that reason, if you need to store data, do it in a volume. In this case, you should also take care if two containers write data on the same volume as it could cause corruption. Make sure your applications are designed to write to a shared data store. — 10 things to avoid in docker containers, #1 Tip The Verdaccio container exposes three mount paths (conf, plugins, and storage), and we’re going to set those folders up first, so that they’re ready to use when Verdaccio is configured later.
docker verdaccio conf plugins storage |
Download Verdaccio
Download the latest 5.x container, which as of 2022-03-01 is 5.6.2. Version 6 (Development branch) — GitHub / Verdaccio
|

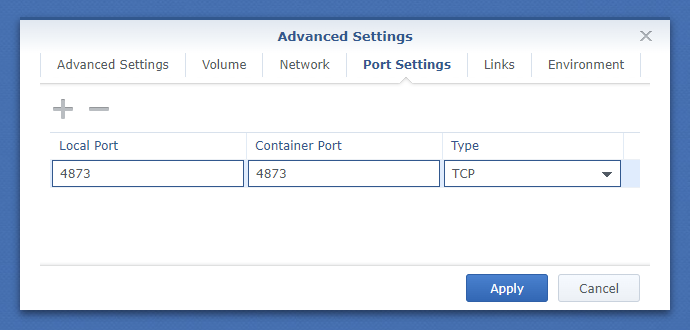
Install Verdaccio
|

Run Verdaccio
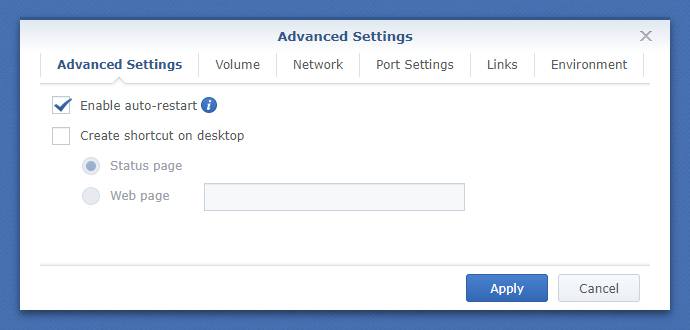
The container should automatically start after applying settings. You can Start, Stop, and Restart it from the Container tab in Docker. Verdaccio has a web user interface to display packages in the registry. Verdaccio has a web user interface to display only the private packages and can be customised to your liking. — Verdaccio, Web User Interface |
Terminal Commands
The Many commands accept an option to target the registry, such as: You can also set the registry so that it’s automatically used when executing future commands. Some Useful Commands
|
Authentication
| � | The basic Verdaccio setup uses htpasswd for authentication. The authentication is tied to the auth plugin you are using. The package restrictions are also handled by the Package Access. — Verdaccio, Authentication Based on config.yaml the file should probably be called You can use a Linux command line program create an htpasswd file, otherwise try this:
Authentication PluginsThere are more than a dozen other authentication plugins offered by the Verdaccio community, and some of them look pretty cool. In the near future, I intend to try the Verdaccio GitHub OAuth plugin, which offers GitHub OAuth integration for both the browser and the command line. Login can be limited to members of a certain GitHub organizations, and package access can be limited to GitHub organizations, teams, repos, and users. If I switch over to it, I’ll update this post with details. |
Publishing Errors
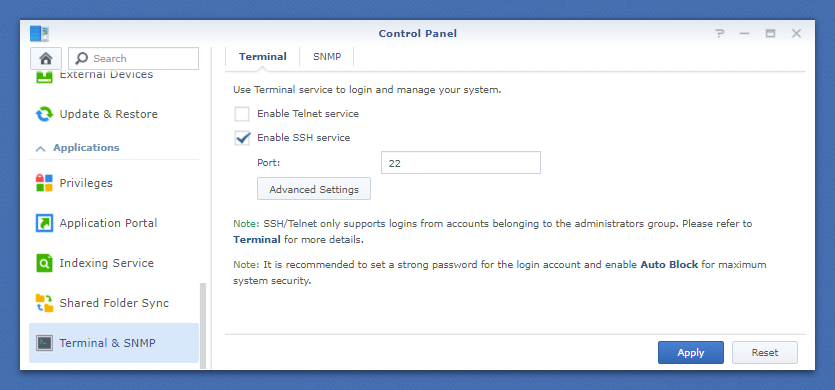
If, when publishing a package in the registry, you receive an error, such as “404 Not Found” or “no such package available”, the problem could be related to folder ownership. By default, the I received these errors myself, and changing the owner seemed to solve the problem. Now changing the owner of a folder or file to another registered user in Synology DSM is pretty straight forward, but changing it to an unknown user or specific UID is not. For that, I believe you need to SSH into the NAS and change it manually from the command line. That’s what I did. SSHIf you’re like me, you probably don’t have SSH enabled under normal circumstances, so you’ll have to temporarily enable it until the folder ownership has changed. To log into the DSM via SSH:
|
Unity Scoped Registry Setup
The Unity manual covers Scoped Registries and Scoped Registry Authentication, and many other sites provide similar information on how to configure a Unity project to connect to a scoped registry. I’ll elaborate on the process later, if necessary. |